
Making your mix louder without clipping is one of the most common challenges producers and audio engineers face — especially in the age of streaming, loudness normalization, and high-impact sound. Everyone wants their mix to compete with commercial tracks, but turning the volume up blindly can result in distortion, loss of dynamics, and even listener fatigue.
So how do professionals achieve loud, clean mixes that hit hard but still sound clear? In this blog, we’ll break down practical, pro-level techniques for getting your mix loud without clipping, distortion, or sacrificing musicality. Along the way, we’ll highlight how platforms like EngineEars empower engineers to deliver streaming-ready mixes that don’t compromise quality.
🔊 What Is Clipping and Why Should You Avoid It? 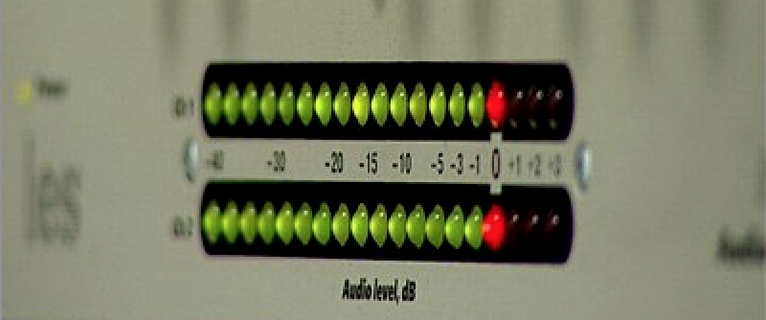
Clipping happens when your signal exceeds 0 dBFS (decibels full scale), the maximum limit in digital audio. This causes the waveform to square off, resulting in harsh distortion — and not the good kind.
Why avoid clipping:
-
Creates unpleasant digital distortion
-
Reduces headroom and dynamic range
-
Damages playback quality on streaming platforms
-
Lowers mix clarity and perceived professionalism
Streaming platforms like Spotify, Apple Music, and YouTube normalize audio, so excessive loudness doesn’t translate to better playback — just worse sound.
✅ How to Make Your Mix Louder Without Clipping
Let’s explore the essential techniques used by engineers to maximize loudness while keeping your mix clean and dynamic.
🎚️ 1. Start With a Balanced Mix
You can’t fix a muddy mix by just making it louder. A well-balanced mix is the foundation of professional loudness.
-
Volume levels: Make sure no element is overpowering. Balance drums, vocals, bass, and instruments first.
-
EQ cleanup: Remove unnecessary low-end rumble with high-pass filters and tame harsh frequencies.
-
Stereo image: Keep your low end mono and spread highs/wides for clarity.
Tip: Engineers often note that the best mixes they receive are the ones that were clean and organized before hitting the limiter.
🧰 2. Use Bussing and Sub-mixes
Organize your session into buses (drums, vocals, music, FX). This gives you better control and lets you apply processing more efficiently.
-
Apply compression or EQ to each bus as needed, rather than over-processing the master.
-
Control dynamics at the group level to avoid unwanted peaks later.
This setup helps preserve headroom while increasing overall impact.
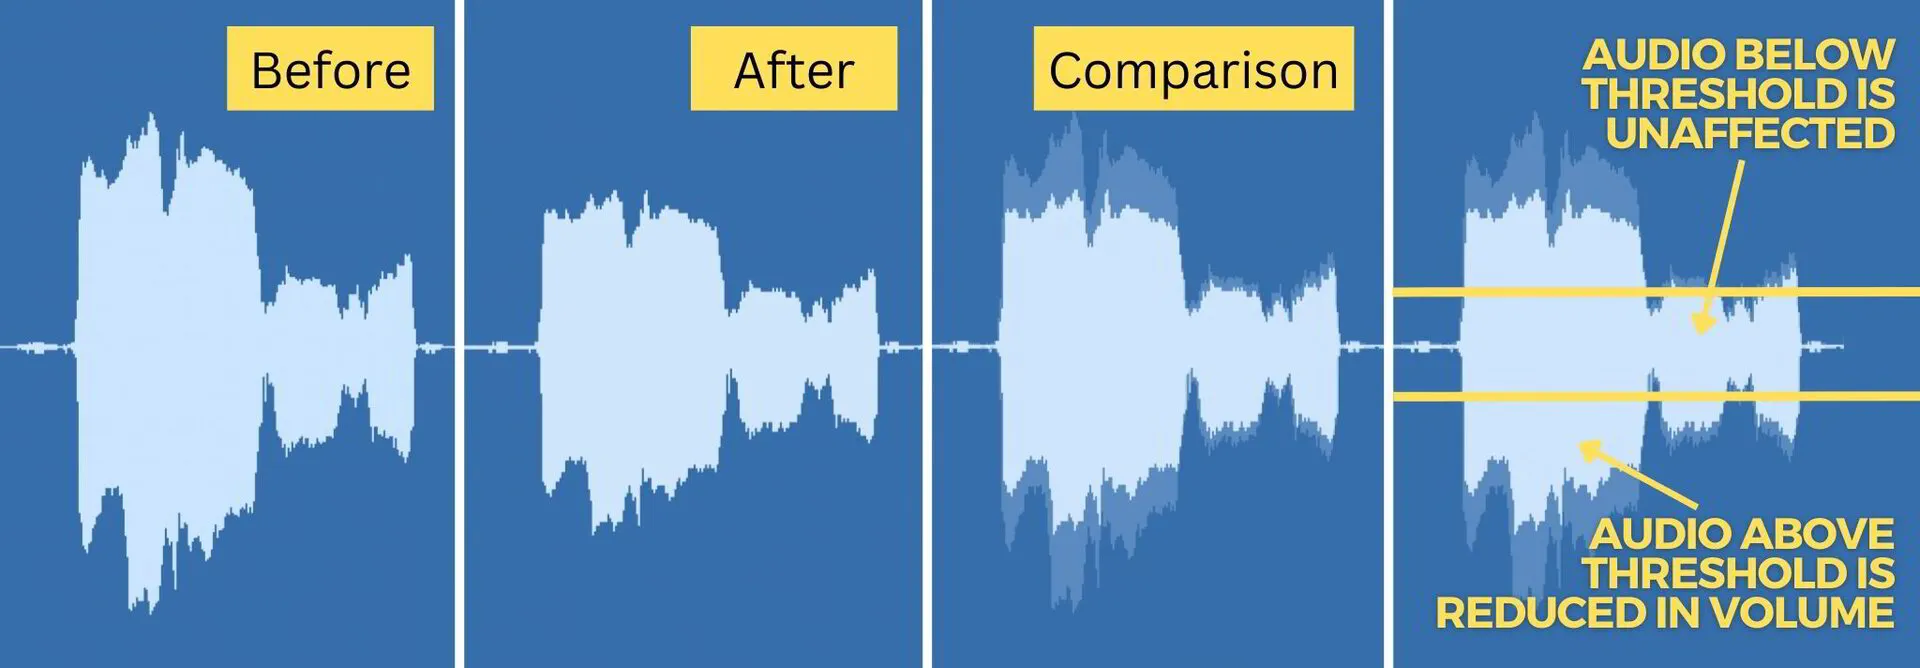 ⚙️ 3. Apply Strategic Compression
Compression is key to controlling dynamics and increasing loudness — without clipping.
Tips for using compression effectively:
-
Use serial compression: Apply multiple compressors with light settings instead of one aggressive compressor.
-
Target peaks: Use fast attack times to catch transients, but not so fast that you squash punch.
-
Parallel compression: Blend a compressed signal with the dry mix to add body without losing dynamics.
🔊 4. Limit Peaks, Don’t Squash Them
Limiters are the final stage in most loud mixes. They reduce volume peaks and allow the overall mix to be pushed louder without clipping.
Best limiter practices:
-
Ceiling: Set your limiter output ceiling to -0.1dB to -1dB to avoid inter-sample peaks.
-
Input gain: Gently increase until you start to hear distortion — then back off.
-
Gain reduction: Aim for no more than 2-4dB of gain reduction on your limiter for clean results.
Popular Limiters:
🎛️ 5. Use Clipping… Intentionally
Not all clipping is bad. Soft clipping adds harmonic saturation and perceived loudness without destroying your mix.
Tools for controlled clipping:
Use clipping before your final limiter to shape peaks and add warmth — just don’t overdo it.
🎚️ 6. Saturate for Perceived Loudness
Harmonic saturation adds upper-frequency content that makes a track feel louder without raising actual volume.
-
Use tape or tube emulation plugins on drums, vocals, or master bus
-
Blend saturation with parallel processing for warmth and control
Recommended Saturation Plugins:
📊 7. Monitor LUFS, Not Just Peak Volume
Modern loudness is measured in LUFS (Loudness Units Full Scale). Streaming platforms have different loudness targets:
| Platform | LUFS Target |
|---|---|
| Spotify | -14 LUFS |
| Apple Music | -16 LUFS |
| YouTube | -13 LUFS |
Aim for:
-
-10 to -14 LUFS depending on your genre and goal
-
True peak max of -1.0 dBTP to avoid conversion distortion
Metering Plugins:
🚗 8. Check Your Mix Across Devices

Don’t just master in your studio. Check your mix in real-world environments:
-
Phone speakers
-
Laptop
-
Car system
-
Earbuds
-
Smart speakers
This step — often referred to as the “car test” — is standard practice for engineers who build it into their QC process before final delivery.
🚀 Bonus: Export Settings Matter Too
Make sure you export at the highest quality:
-
Have a 24-bit version for reference and print a 32-bit version for the mastering engineer to preserve any peaks that may jump over 0 db.
🧠 Final Thoughts: Louder Isn’t Always Better
In the end, a clean, dynamic, and punchy mix will always outperform an overly loud one. Loudness is about perception, not just gain. By following these steps — from mix prep to mastering — you can make your mix stand out without sacrificing clarity or professionalism.
Whether you’re doing it yourself or working with a seasoned pro through EngineEars, the goal remains the same: loud, clear, emotionally impactful music that sounds great everywhere.
📥 Want More Pro-Level Mixing Tips?
Subscribe to our blog for expert tutorials, gear reviews, and industry tips. And if you’re looking to elevate your mix even further, explore the EngineEars platform to connect with certified engineers and discover tools that make your music shine.